How to change a keg
Have you ever had a moment of fear, as a keg ran dry and you realised you’re the one who must go to the cellar to change it?
Or maybe you’re more confident with kegs, but have returned from a day’s leave to find certain beers are off because no one on duty knew how to change one?
Neither of these scenarios needs to happen! Read our guide on to how to change a keg.
How to change a keg – in summary
Changing a keg is a basic operation that anybody should be able to do. In summary:
- Switch off the gas, sanitise your connections (e.g. coupler, top of the new keg, and valve), and make sure you have your new keg ready.
- Connect the coupler to the new keg and then switch on the gas.
- Bleed the fob detector until completely full, making sure the float rises to the top.
- Lastly, put the fob detector back into dispense mode.
Sounds easy? Provided you pay attention and follow the correct procedures, it is!
How to change a keg – step-by-step
If you’re new to the hospitality trade, not very confident when it comes to keg changes or need a refresher, here’s the process in a bit more detail.
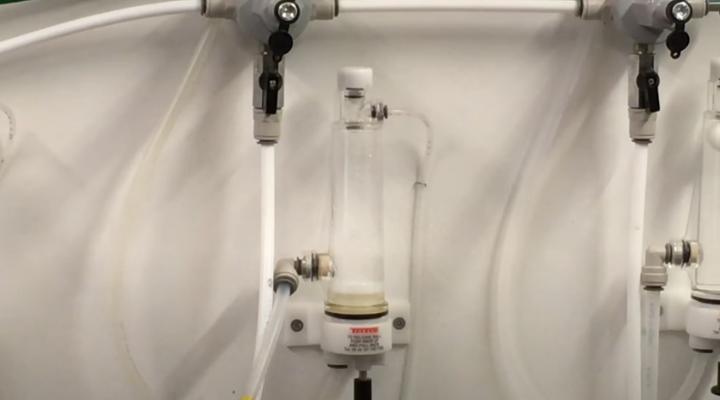
In the cellar, begin by locating the empty fob detector (aka cellar buoy). From here, trace the beer line to locate the keg which has run out
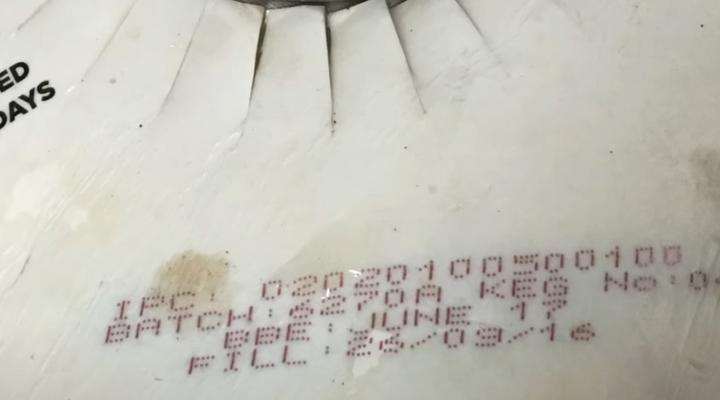
Once you know which keg needs changing, locate a new keg and check its best-before date. NB: Be aware of stock rotation measures. Use the keg with the soonest date first and save later-dated kegs for another time. This ensures beer is served as fresh as possible.
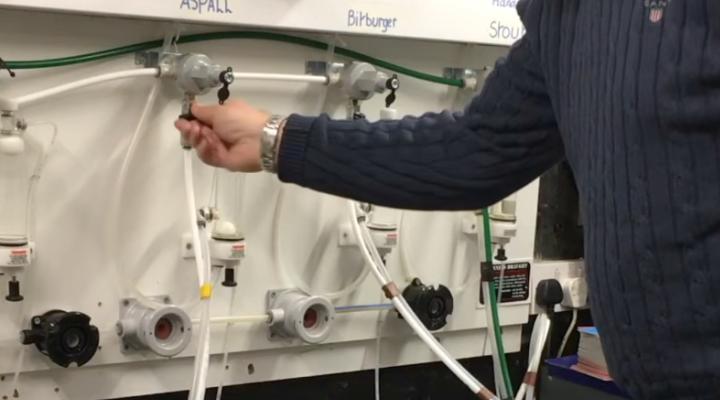
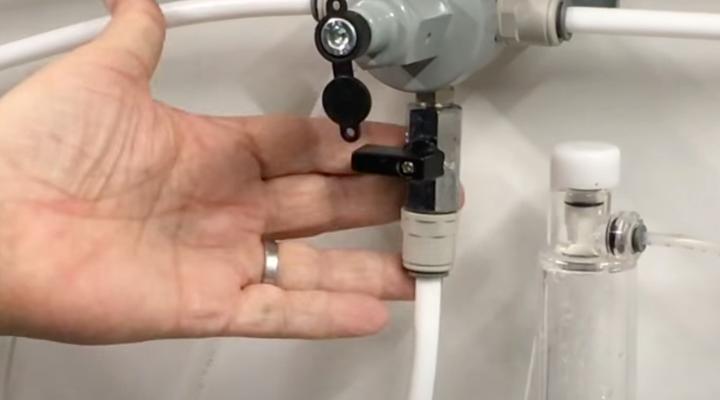
Next, switch off the keg gas for the specific keg you are changing. (Look for a small tap or lever on the line, close to where the fob detector is).
You’re now ready to disconnect the empty keg. NB: Avoid standing with your face over the keg to do this! Internal pressure can make the coupler fly towards your face with force.
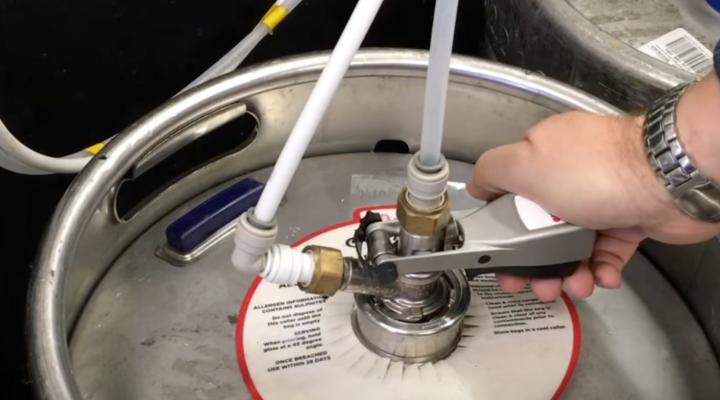
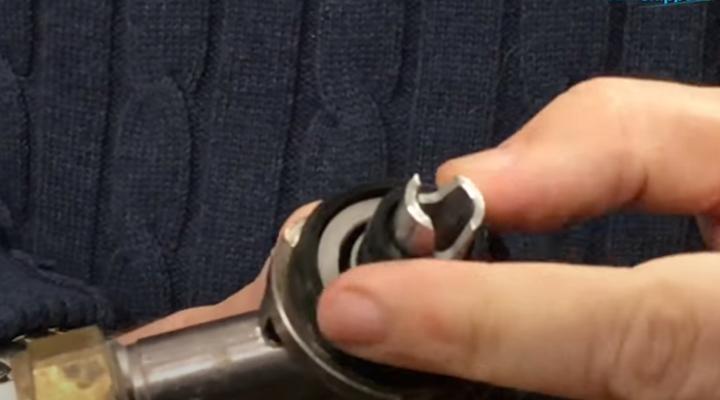
You’ll need to press down the coupler lever attached to the old keg and then turn it anti-clockwise so you can lift it away and detach it from the keg.
- Grip the coupler handle and depress the lever underneath.
- Hold the coupler firmly, pull up the handle, and turn until it releases from the keg top. (Some couplers will slide off; others need turning or rotating up to 180 degrees)
Next, check the coupler is in good working order. Make sure its moving parts move freely and that its seals are in good condition and able to stay airtight once re-connected.
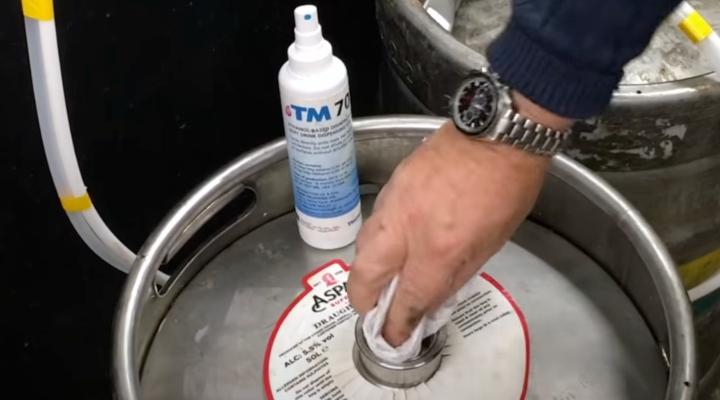
When you’re happy with the condition of the coupler, spray it with food-grade sanitiser to ensure that it is clean and hygienic before it is reconnected.

Now remove the dust cap from the new keg, then clean and sanitise the top of the keg spear where you attach the coupler. Wipe it with a clean cloth or kitchen roll, and spray with a food-grade sanitiser, before reconnecting the coupling head and rotating it clockwise. Press the lever down to lock it into place.
Switch the keg gas back on.
You must now bleed the fob detector until it is FULL of beer:
Always follow the instructions on your specific fob detector, but often it’s as simple as pressing a button on top, which refills it with beer (holding a jug under the fob detector’s pipe as you do so to catch any overflow), then pulling and pushing a button at the bottom to return it to dispense mode.
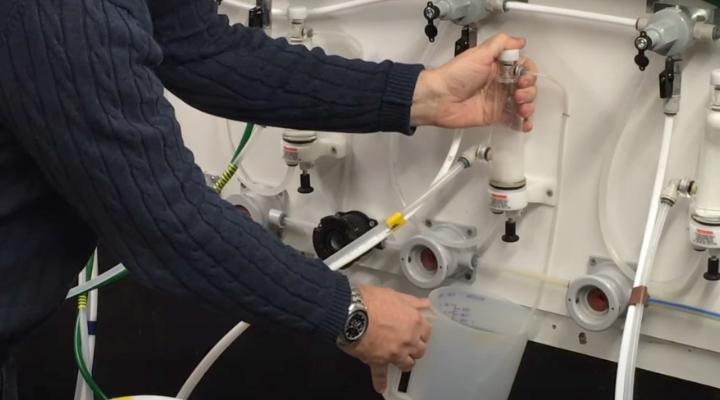
- Push in the pin or turn the release lever to allow the line pressure to equalise and release the float which will rise to the top.
- Make sure you then put the fob back into dispense mode, usually by pushing or pulling the pin again.
Back at the bar, you should now be ready to pull a fresh pint from the keg you have just changed. Be sure to check the beer smells, looks, and tastes as it should before serving.
Troubleshooting problems when changing a keg
Once you become practiced at keg changes you should find it a breeze, but until then here are a few common problems and how to handle them.
Problem: There’s lots of foam and froth which seems to be spurting all over the place.
You might not have put the fob detector back into dispense mode. See step 9 above.
Problem: Changing a keg is a nightmare because the cellar is a higgledy-piggledy mix of empties and full kegs that threaten to trip staff up or fall on them, and no one wants to go down there!
Make life easy – and safe – by always keeping your cellar clean, organised, and tidy. “A place for everything and everything in its place,” is sound advice.
Problem: Gas and pressure discharge from the coupler.
It’s likely gas to the problem coupler wasn’t turned off during the changeover.
Give your venue team the edge with the fundamentals of beer quality and dispense. Our Beerista beer quality workshops are memorable, fun, and effective.

